
Normally, you cannot join custom multiplayer servers on Minecraft for Xbox. If you follow these steps, you will be able to join!
Note: This tutorial will not work for everyone. Certain settings on your router may prevent the trick from working. You will know if it doesn’t work for you if Step 8 fails.
Note 2: Make sure to write down any settings you change so that you can change them back in case there are any problems.
Step 1: In the menu, go to the gear icon and select the “Settings” button.

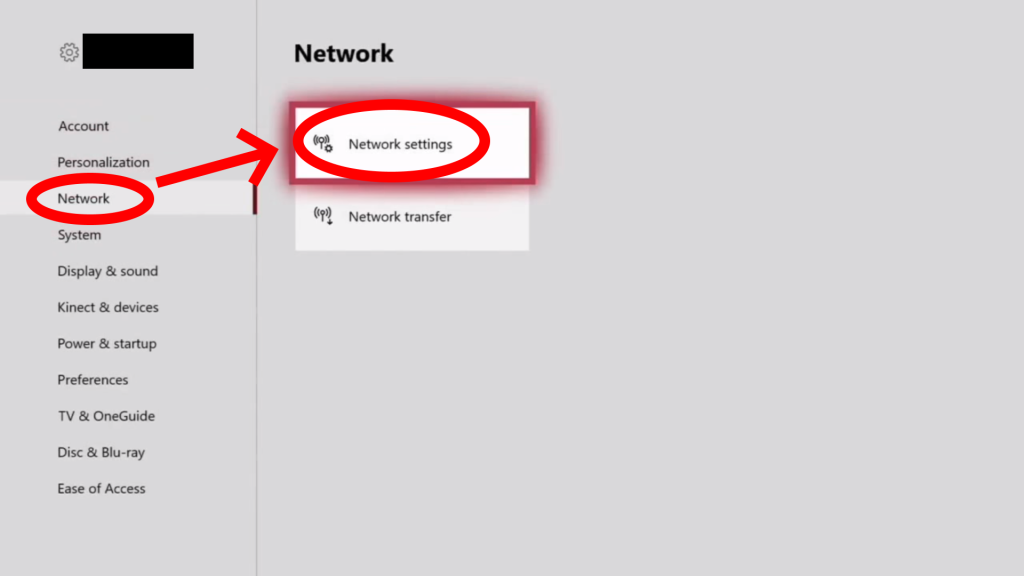
Step 2: Select “Network” on the left, then “Network settings” on the right.
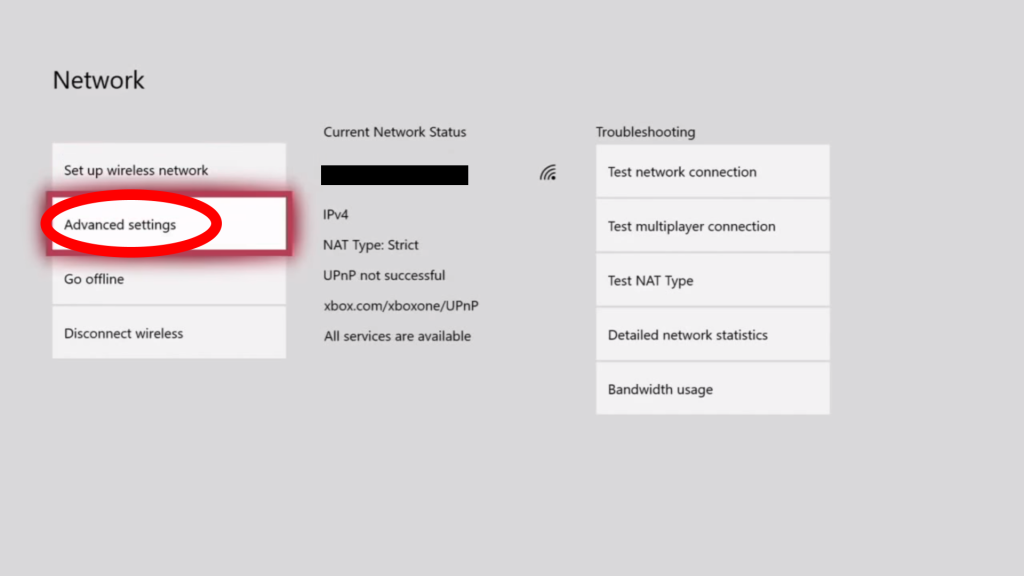
Step 3: Select “Advanced settings”.
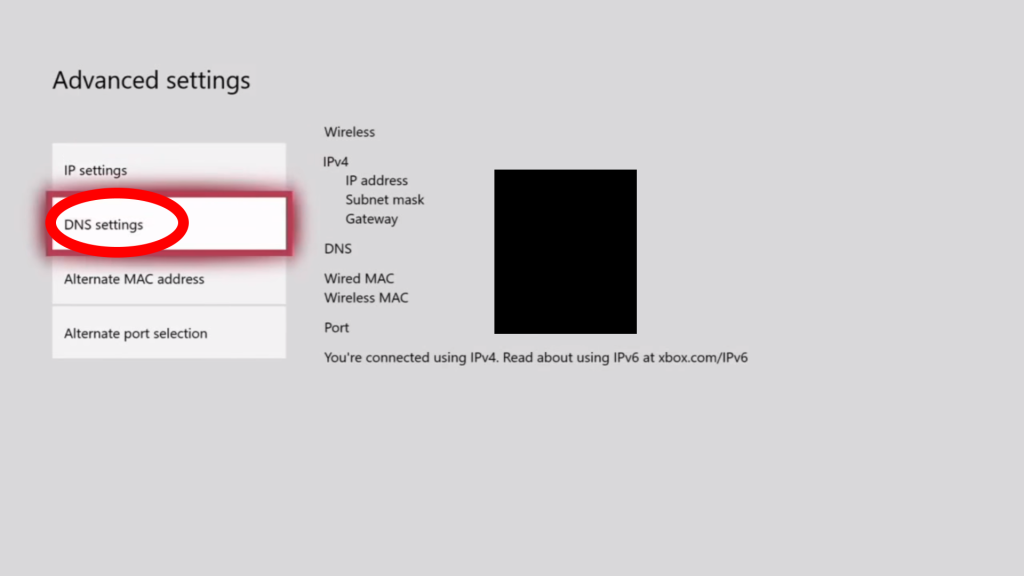
Step 4: Select “DNS settings”.
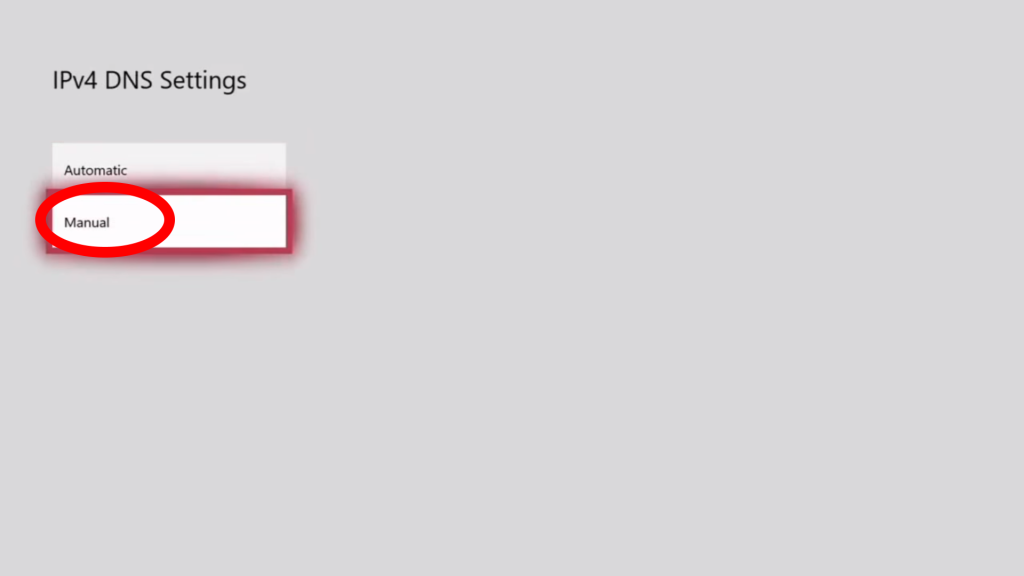
Step 5: Select “Manual”.
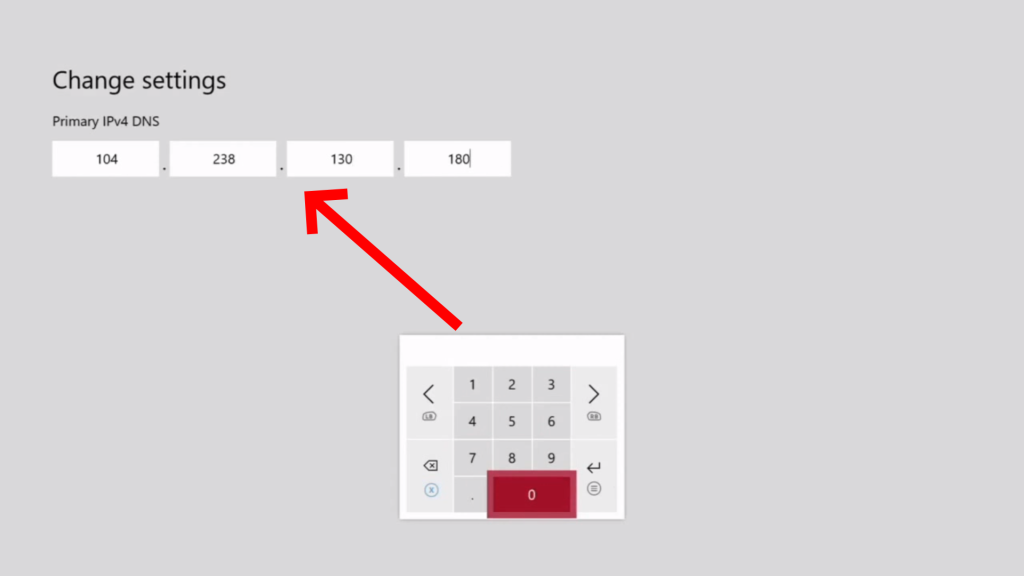
Step 6: Enter 104.238.130.180 and enter.
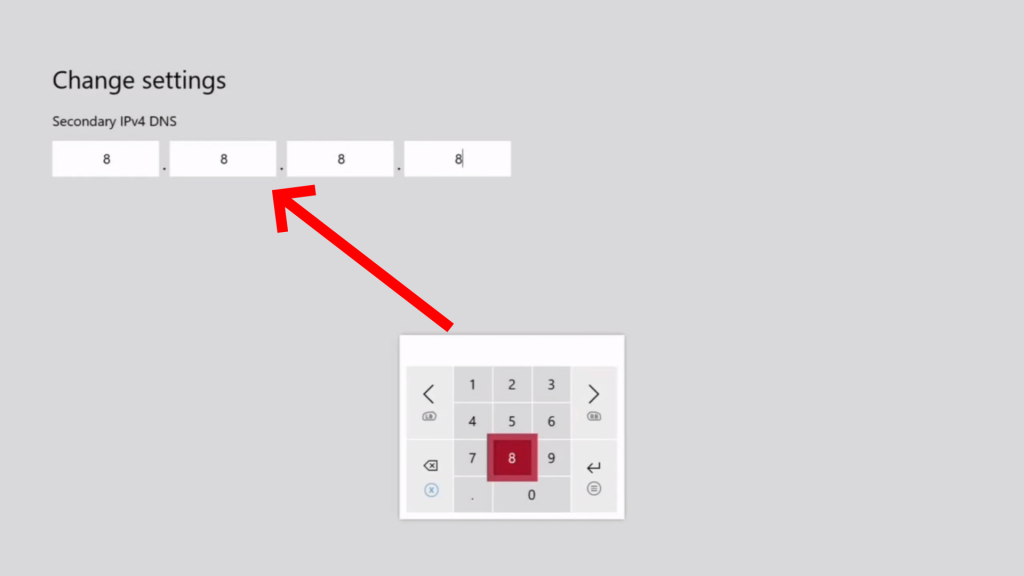
Step 7: Enter 8.8.8.8 and enter.
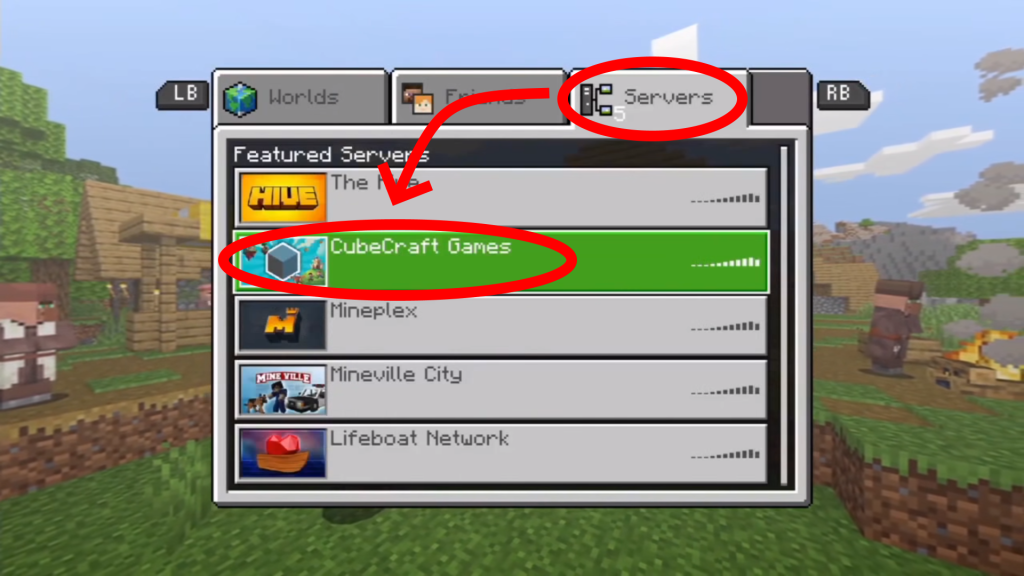
Step 8: Go to the “Servers” tab and select any of the servers.
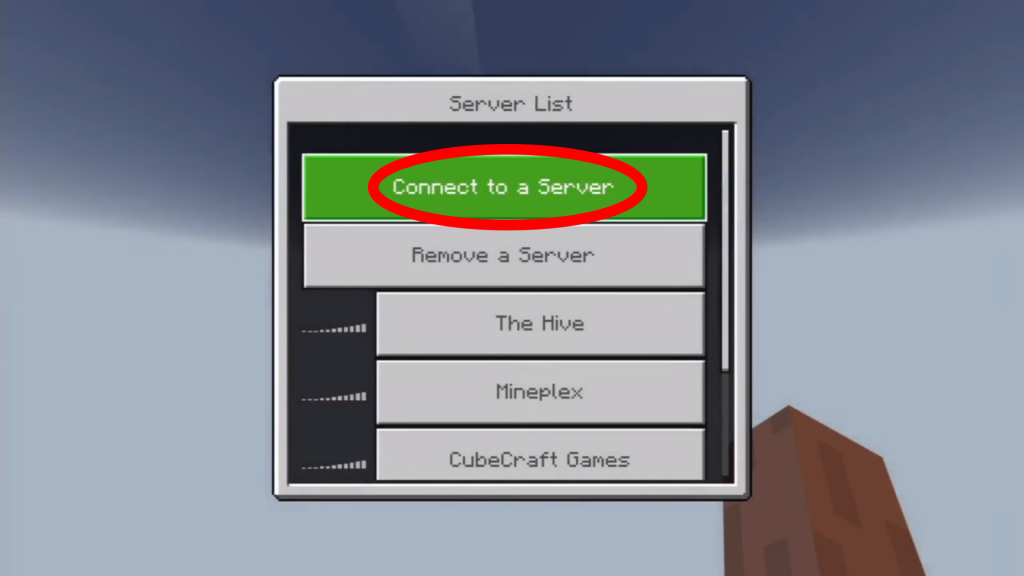
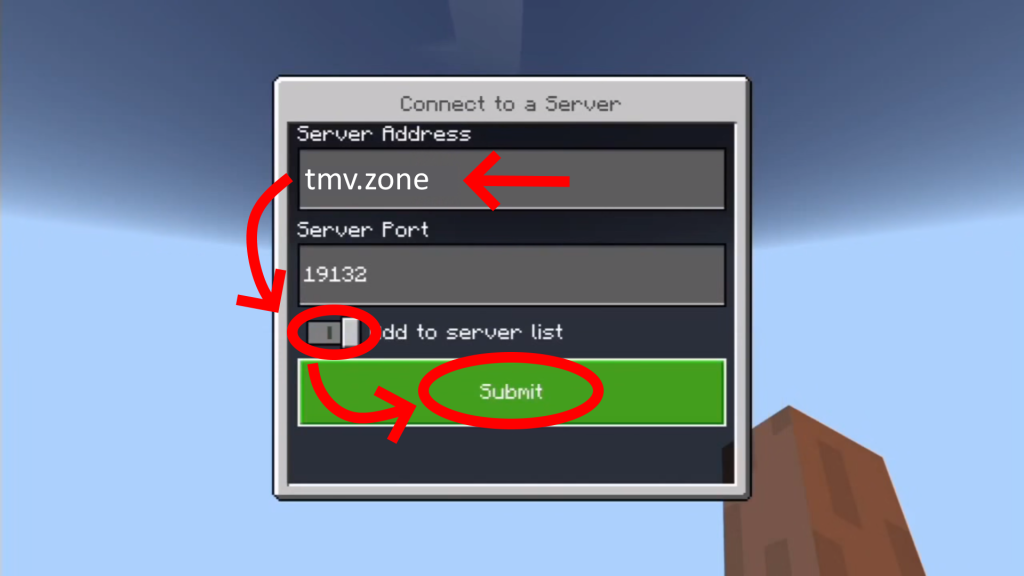
Step 9: Select “Connect to a Server”.
Step 10: Fill in the boxes as shown in the image below. The important part is that you put tmv.zone as the Server Address. Switch the “Add to server list” switch to the right so that the server will be easier to join in the future. Then click “Submit”.
If this tutorial did not work, you can also try using the PlayStation tutorial to join. It works for Xbox players, too! Click here to try it!
Congrats! If you made it to the last step, that means you have successfully joined the server!
You will join in a lobby. Walk through the portal of the game you would like to play.
Please keep in mind that griefing/stealing is against the rules on all games and doing so will result in a ban.